Proper Installation of Wheel Spacers: A Step-by-Step Guide
Before Installing Wheel Spacers:
To ensure a successful installation, it's crucial to choose the right wheel spacers for your vehicle. Pay attention to factors such as vehicle bolt pattern, wheel bolt pattern, thread size, spacer thickness, and center bore. Wheel spacers can be categorized into two types: those that slide into the hub with their own lug studs and nuts, and those that bolt to the vehicle hub using extended wheel bolts. For this guide, we'll focus on the latter type. Hub-centric wheel spacers, like Rokblokz Elite Wheel Spacers, are highly recommended as they provide optimal performance. Check them out here.
Steps to Properly Install Wheel Spacers:
Step 1: Preparation
Park your car in a safe, well-lit, and level area. The installation process is relatively simple and can typically be completed in an hour or so. Gather the following tools: jack, jack stands, lug socket, torque wrench, wheel hanger (optional), impact wrench (optional), degreaser (optional), emery cloth (optional), and a towel (optional). As a safety precaution you may want to make sure the parking brake is engaged to prevent the car from rolling.
Step 2: Loosen All Lug Nuts
Loosen all the lug nuts that secure the wheel to the hub using a "Star" shape pattern. Be sure not to fully remove them. For sufficient torque, use the resistance of the tire against the ground for the initial "break" of the seated the nuts. This prevents the wheel from spinning like happens when the vehicle is lifted.
Step 3: Lift the Car
If you don't have access to a car lift, a jack and a set of jack stands will suffice. Carefully slide the jack under the vehicle's appropriate lift point and slowly raise it to a height that allows a single wheel to be completely off the ground. Place a jack stand under the vehicle to ensure proper support, adjusting it as needed.
![]()
Step 4: Remove the Wheel
Once all the lug nuts are loosened, carefully remove them from the raised wheel. Hold the wheel with your hands to prevent any sudden drops, and slide the wheel off the hub. Set it aside for now.
![]()
Step 5: Prepare the Wheel Hub
Take this opportunity to clean the vehicle hub. Use a degreaser to spray the lug studs and the rotor hat, and wipe them down with emery cloth. If the hub is dirty, rusted, or pitted, use the emery cloth to thoroughly clean the surface. Ensure that the entire hub surface is clean and smooth.
![]()
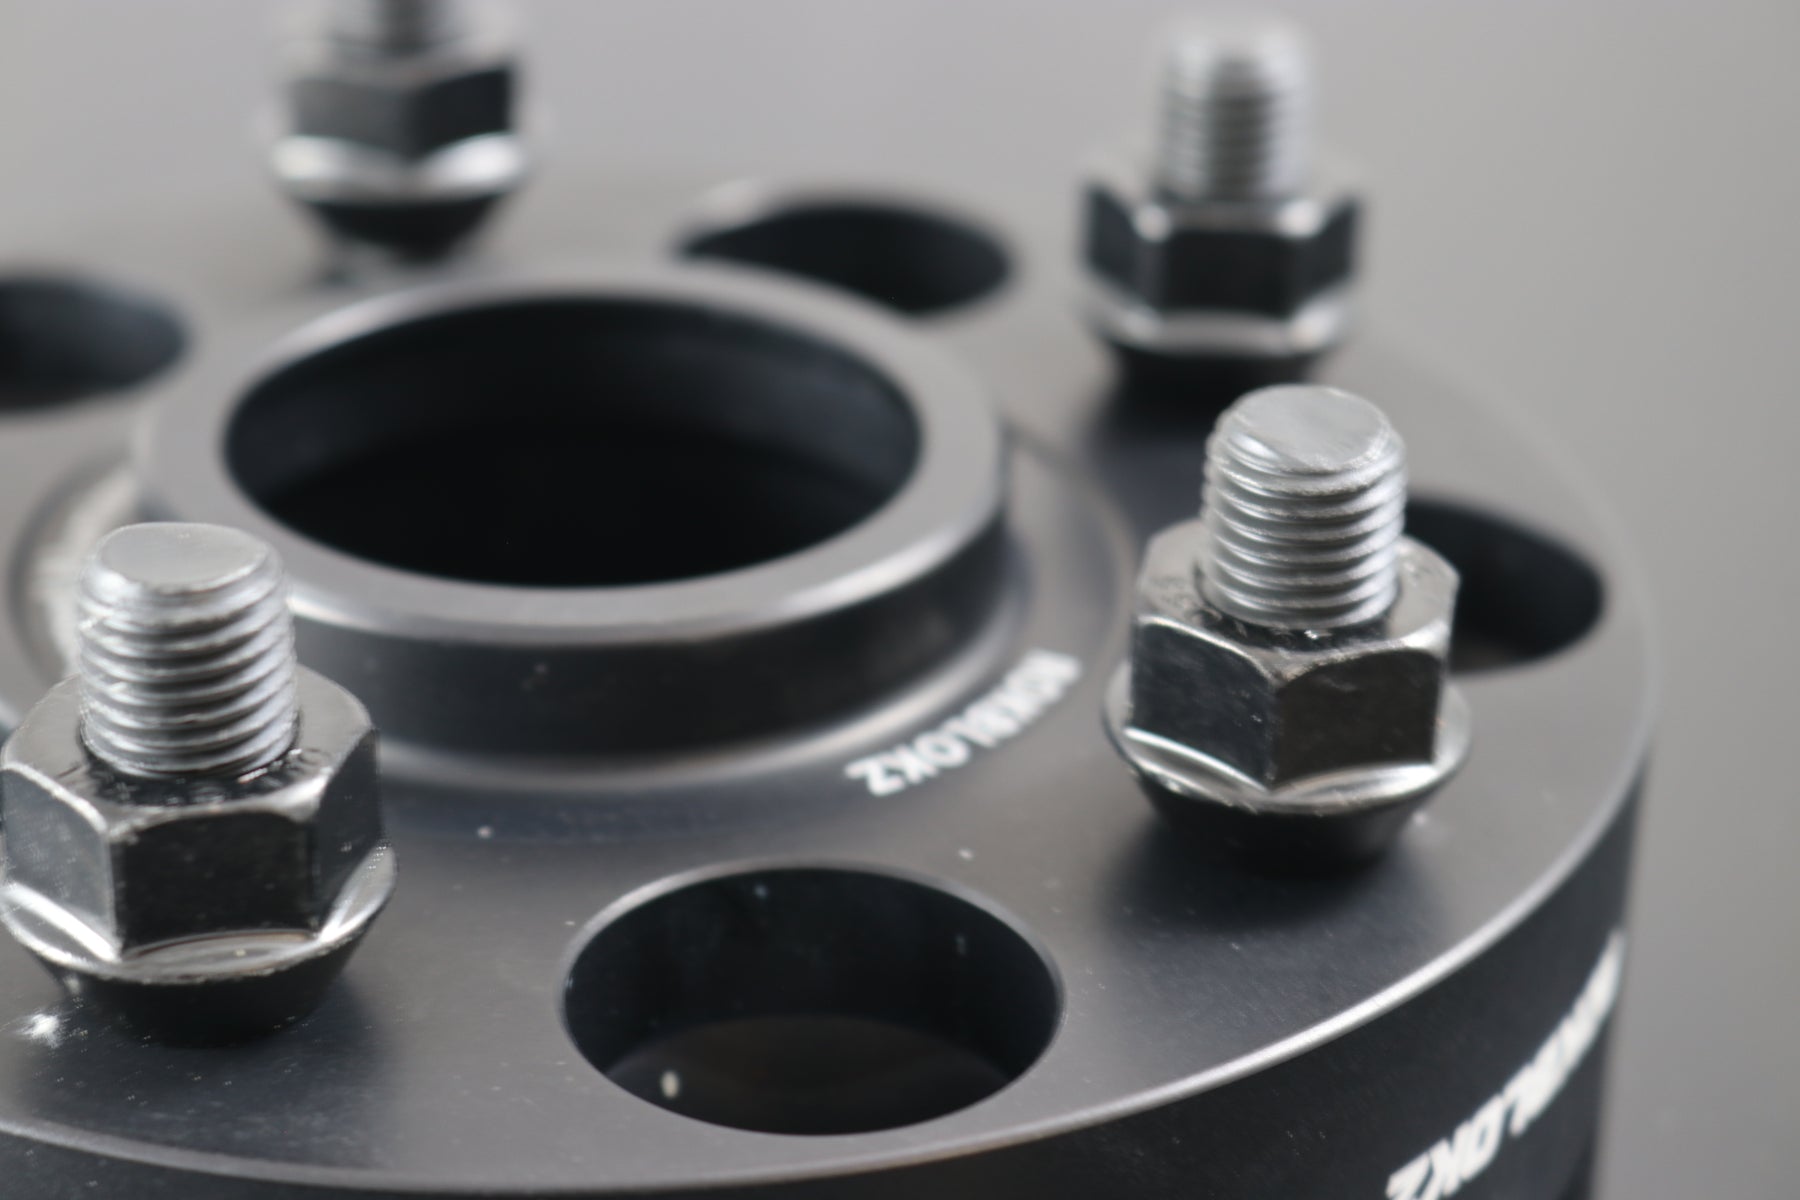
Step 6: Install the Wheel Spacer
Place the ROKBLOKZ Wheel Spacer onto the hub, aligning the holes in the spacer with the wheel studs. Ensure that the wheel spacer is firmly seated and flush against the hub. Use the matching lug nuts (the ones that came with the spacers) to tighten the wheel spacer to the original studs. Carefully turn the lug nuts by hand to ensure they are easy to thread in, avoiding cross-threading. Tighten them by hand, but avoid fully torqueing the lug nuts at this stage.

Step 7: Torque the Matching Lug Nuts
Using a torque wrench with the manufacturer-recommended torque specification, snug up the lug nuts in a star pattern. Avoid overtightening the nuts. Also, make sure that the original studs do not protrude past the wheel spacer surface. If you encounter any issues with the hubs rolling while tightening the nuts, ask an assistant to press the brake pedal to prevent the hub from rotating.
Tighten using the star pattern as shown below when following the numbers in order.

General Torque recommendations by stud size in ft/lbs: 12mm = 70-80, 7/16 = 55-65, 1/2 = 75-85, 14mm = 85-95, 9/16 = 95-115, 5/8 = 135-145

Step 8: Remount the Wheel
Slide the wheel onto the new studs that protrude from the wheel spacer, making sure it seats firmly against the wheel spacer. Secure the wheel with the factory lug nuts using the star pattern, but avoid fully torqueing them at this stage. Simply put them in place and fasten them slightly. Repeat this step with the remaining lug nuts.
![]()
Step 9: Carefully Lower the Vehicle
Remove the jack stand, and slowly lower the vehicle using the jack until the wheel is in full contact with the ground. Once the wheel is firmly on the ground, remove the jack.
![]()
Step 10: Torque the Lug Nuts to Specification
Using a torque wrench with the manufacturer-recommended torque specification, snug up the lug nuts in a star pattern to ensure that the load is applied evenly. Avoid overtightening the nuts.
![]()
Step 11: Repeat Steps 1-10 for the Remaining Wheels
Congratulations! You have successfully installed the spacers on one wheel. Repeat the entire process for the remaining wheels. Afterward, it's advisable to take a test drive to check for any vibrations or wobbling and to experience the improved handling performance.
Follow-up Safety Information:
- Properly installed high-quality wheel spacers are safe for your vehicle.
- This guide is provided as a general guideline and may not be specific to your vehicle. Always follow the vehicle manufacturer's installation instructions.
- Unless you are a professional or under the guidance of a qualified mechanic, do not attempt to install, service, or replace your wheels, tires, or wheel spacers.
- Never work on or under a vehicle raised solely by a jack, as it can lead to serious injury or accidents.
- Double-check that all lug nuts are tightened to the manufacturer's specification using a properly calibrated torque wrench, following a crisscross or star pattern.
- Before driving, check and confirm proper alignment and function of your wheels and tires.
- Examine the performance of your wheels, tires, and wheel spacers in a controlled environment before driving.
- Do not operate the vehicle if the wheels, tires, or wheel spacers are damaged or worn.
- Regularly inspect the tightness of the lug nuts, especially soon after installation. After driving approximately 50-100 miles, recheck the spacers to ensure they are securely in place and the lug nuts are properly tightened.
By following these steps and adhering to the safety guidelines, you can properly install wheel spacers and enjoy the benefits they offer.
Leave a comment